This comprehensive blind measuring guide will walk you through the essential steps to achieve a pensure perfect fit for any window. We will cover the nuances of both inside and outside mount installations, the tools you’ll need, and common pitfalls to avoid, empowering you to make informed decisions for your home. For instance, understanding the differences between real wood vs faux wood blinds can influence your measurement strategy.
The quest for a pensure perfect fit hinges entirely on the accuracy of your window measurements. Even a slight miscalculation can lead to blinds that are too wide, too short, or don’t operate smoothly, compromising both their appearance and utility. Incorrect measurements can result in light leakage, difficulty in raising or lowering the blinds, or even damage to the window frame itself.
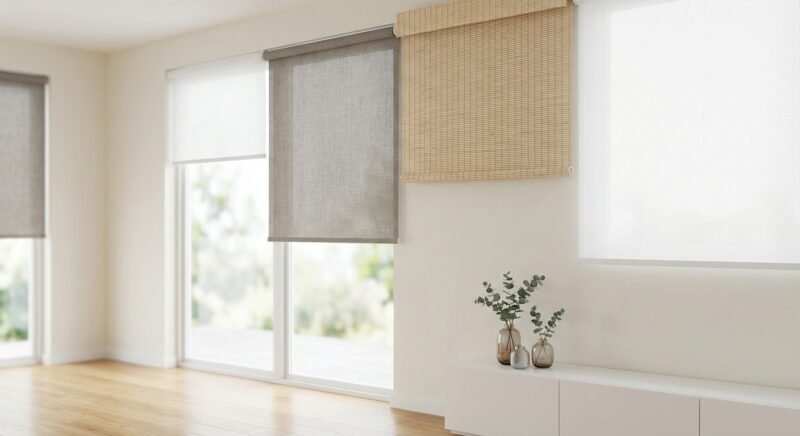
When blinds are not measured correctly, they can detract from the overall aesthetic of a room. For instance, an inside mount blind that’s too wide will bind against the sides of the window frame, while one that’s too short will leave unsightly gaps at the top or bottom. Understanding the modern window treatments involves appreciating how precise sizing impacts their visual appeal.
Functionality is equally critical; a blind that scrapes against the window sill or fails to hang straight can be frustrating to operate. Furthermore, inaccurate measurements can sometimes lead to voided warranties, leaving you responsible for the cost of replacements. This guide aims to help you avoid these issues, ensuring your investment delivers a pensure perfect fit and lasting satisfaction.
Essential Tools for Accurate Measurements
To achieve a pensure perfect fit, gathering the right tools is the first practical step. Precision is key, and using the correct instruments will significantly increase your accuracy. Having these items on hand before you begin measuring will streamline the process and minimize the chance of errors.
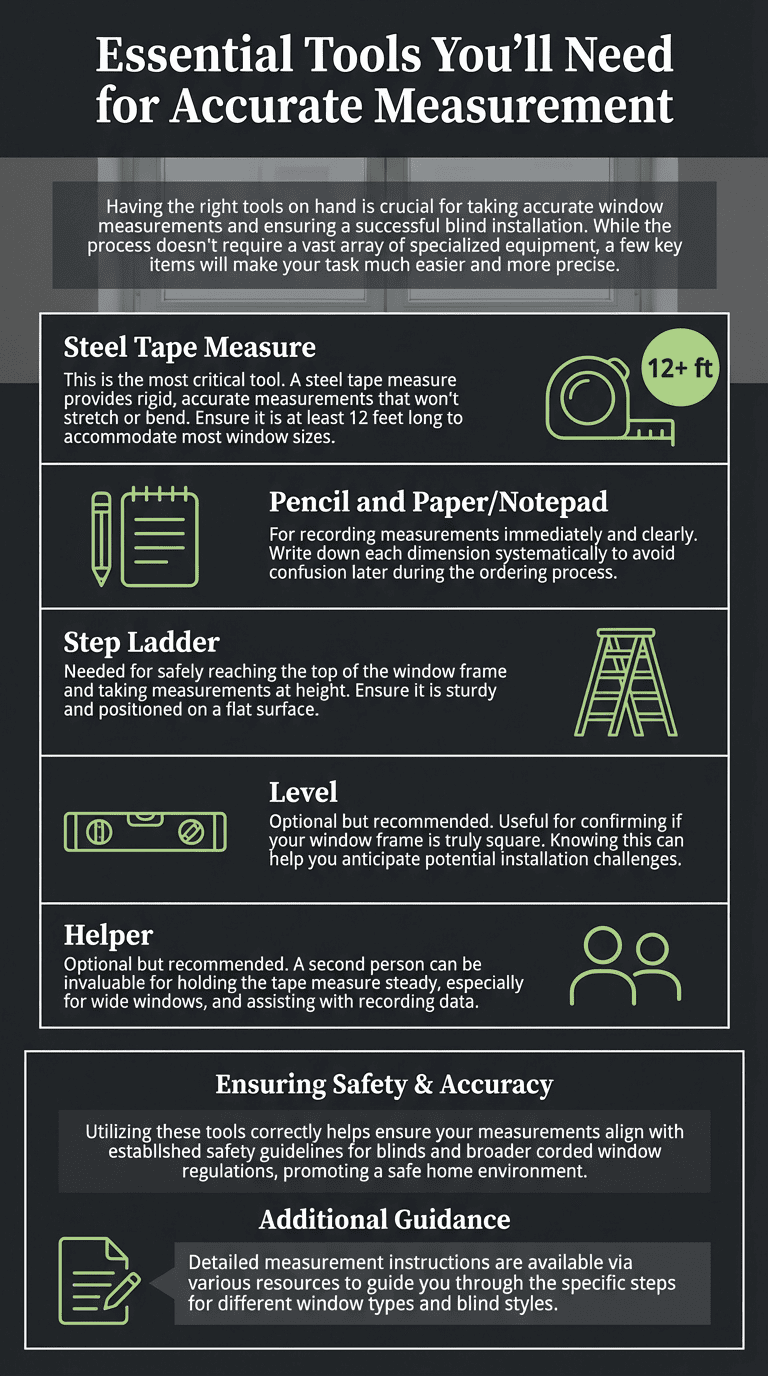
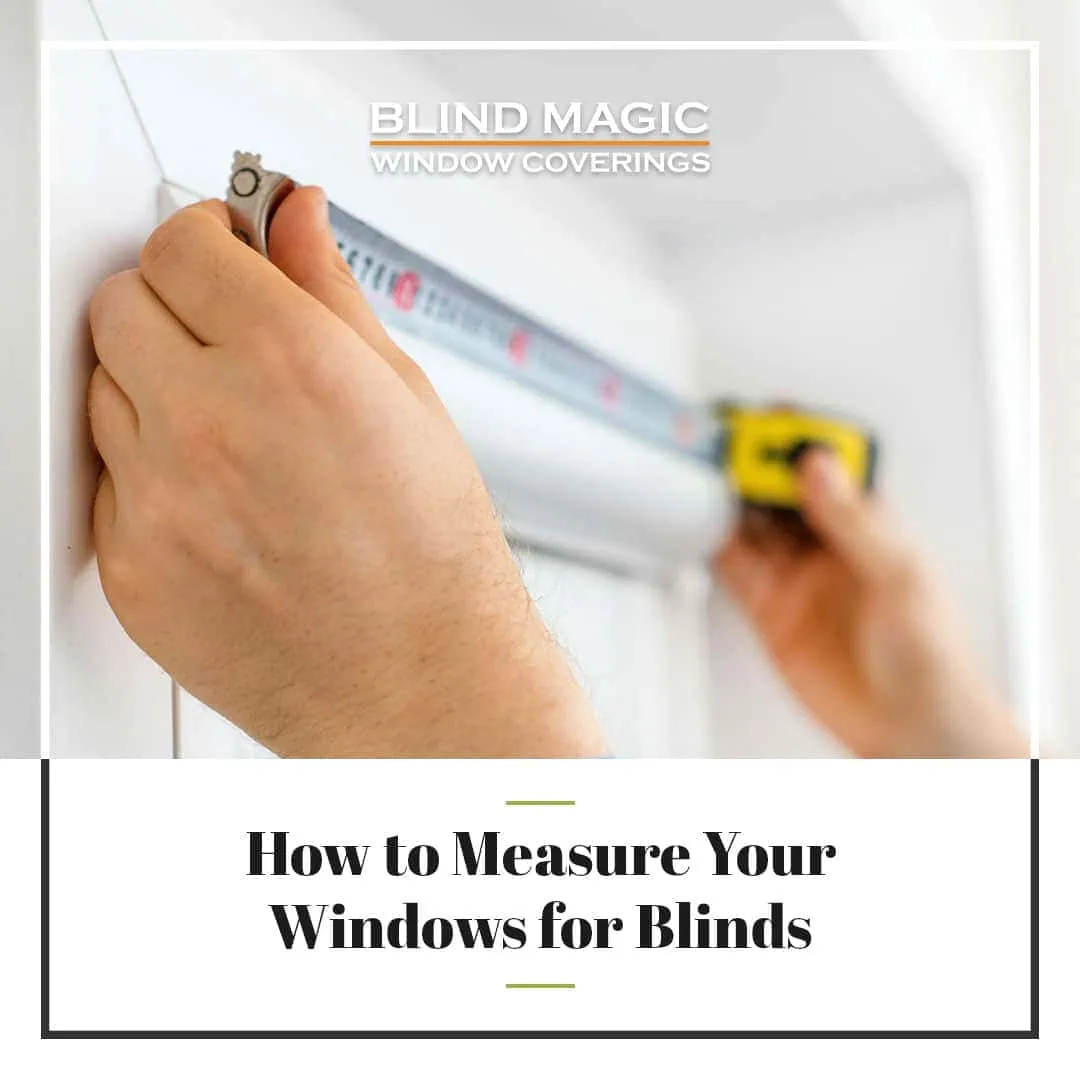
The primary tool you will need is a sturdy metal tape measure. Avoid using cloth tape measures, as they can stretch and provide inaccurate readings. A steel tape measure, preferably one that is 3/4″ to 1″ wide, offers the rigidity needed for precise measurements. It’s also helpful to have a pencil and a notepad to record your measurements clearly. For those considering premium window treatments, understanding the specifics of Hunter Douglas shades can be beneficial.
For windows that are high up or difficult to reach, a stable step ladder is essential. Ensure it is placed on a level surface and used safely. Remembering to measure each window individually is also a crucial practice, as variances in size are common, even in rooms that appear identical. Following these guidelines will help ensure you are well-equipped for accurate measurements and a pensure perfect fit.
Using a Steel Tape Measure
For information on advanced window treatments, explore our guide to modern window treatments for the latest trends and ideas.
A steel tape measure is indispensable for obtaining accurate window dimensions. Unlike flexible fabric tapes, steel offers rigidity, preventing sagging or stretching that can lead to incorrect readings. It is recommended to use a tape measure that is at least 3/4 inch wide for better stability, especially when measuring longer spans. If you need to remove existing window coverings, learn how to safely remove Bali blinds from their brackets using this tutorial for more.
When measuring, extend the tape measure fully and ensure it lies flat against the surface without bending. For width measurements, extend the tape from one edge of the frame to the other. For height, measure from the top of the frame to the bottom. Always ensure the tape is perpendicular to the surface being measured to get the most accurate result for your pensure perfect fit.
The Role of a Step Ladder
For windows situated higher up, a reliable step ladder is crucial for safe and accurate measurements. It allows you to reach the top and sides of the window frame without overextending, which could lead to inaccurate readings or a safety hazard. Ensure the ladder is placed on a level, stable surface before ascending. For more information on window treatments and installation, consider exploring our modern window treatments guide, including details on privacy light top down bottom up blinds.
When using a step ladder, have your tape measure and notepad ready. It’s often easier to have a second person assist by holding the end of the tape measure at the far side of the window while you read the measurement. This collaborative approach can significantly improve accuracy, contributing to the pensure perfect fit you desire.
Recording Measurements Accurately
It’s vital to record your measurements immediately and legibly to avoid confusion. Use a pencil and a dedicated notepad to jot down the width and height dimensions for each window. Many professionals recommend recording measurements to the nearest 1/8 inch to ensure maximum precision for your blinds.
Clearly label each measurement with the window it corresponds to, and specify whether it is a width or height measurement. Some prefer to write “W” for width and “H” for height. This organized approach ensures that when you order your window treatments, you are providing the correct dimensions for a pensure perfect fit. For more interior design inspiration, consider these modern window treatments, like the effortless control offered by smart living motorized blinds for more.
Measuring for Inside Mount Blinds
Inside mount blinds are designed to fit snugly within the window frame, offering a clean and minimalist look. Achieving a pensure perfect fit for this type of installation requires careful measurement of the window opening itself. The goal is to provide the exact dimensions of the opening, allowing the manufacturer to make any necessary deductions for hardware and smooth operation.
To start, you will need to measure the inside width of the window frame in three places: at the top, the middle, and the bottom. Similarly, measure the inside height of the window frame on both the left and right sides. It’s essential to use your steel tape measure and record these dimensions meticulously. For more complex window treatments, consider exploring our guide to half arched window blinds for custom solutions.
The key to a successful inside mount measurement is to record the smallest width and the smallest height measurement. This ensures that the blind will clear any slight imperfections or curves within the window frame. By following these steps, you guarantee that your blinds will sit flush and operate smoothly, providing that desired pensure perfect fit.
- Measure the inside width at the top of the window frame.
- Measure the inside width at the middle of the window frame.
- Measure the inside width at the bottom of the window frame.
- Measure the inside height on the left side of the window frame.
- Measure the inside height on the right side of the window frame.
- Record the smallest width measurement and the smallest height measurement.
Measuring for Outside Mount Blinds
Outside mount blinds are installed on the surface of the window trim or the wall surrounding the window opening. This method is often chosen when an inside mount is not feasible due to window depth or obstructions, or when you wish to cover the entire window for maximum light blockage. Achieving a pensure perfect fit for an outside mount involves considering the window opening and any desired overlap. For a wide selection of window treatments, explore our designer roller shades for more.
To begin measuring for an outside mount, determine the desired width. This typically involves measuring the width of the window opening and then adding an overlap on each side. A common recommendation is to add at least 1.5 to 3 inches of overlap on each side to ensure the blind fully covers the glass and minimizes light leakage. This overlap is crucial for a pensure perfect fit and enhanced privacy.
Similarly, for the height, measure the window opening from the top of the trim to the bottom and add any desired overlap. Consider any obstructions such as window cranks, locks, or decorative trim that might interfere with the blind’s operation. Planning for these elements ensures your outside mount blinds will not only look good but also function flawlessly. For more information on different types of blinds, you can explore our guide to Alta roller shades for more.
- Measure Width: Measure the window opening’s width and add 1.5 to 3 inches on each side for overlap.
- Measure Height: Measure the window opening’s height and add overlap at the top and bottom as needed.
- Account for Obstructions: Note any hardware, trim, or features that might impede the blind’s placement or movement.
- Ensure Coverage: The blind should extend beyond the frame to fully cover the glass area.
Common Measuring Mistakes to Avoid
Even with a detailed blind measuring guide, mistakes can happen, jeopardizing that pensure perfect fit. Being aware of common errors is the first step in preventing them. These oversights often lead to blinds that don’t function correctly or look out of place in your home.
One of the most frequent mistakes is not measuring in multiple places. For instance, failing to measure the width at the top, middle, and bottom of an inside mount can lead to issues if the window frame isn’t perfectly square. Always record the narrowest measurement for width and height to ensure clearance.
Another common error is forgetting to account for obstructions or window depth. For inside mounts, ensure there’s enough depth to accommodate the blind mechanism. For outside mounts, verify that window cranks, sills, or other hardware won’t interfere with the blind’s operation. Taking the time to double-check your measurements can save significant hassle and ensure a pensure perfect fit, especially when considering options like motorized blinds for automated operation.
| Common Mistake | Correct Practice |
|---|---|
| Measuring width or height in only one spot. | Measure width at the top, middle, and bottom; measure height on both left and right sides. Record the smallest dimension for inside mounts. |
| Using a flexible tape measure. | Always use a steel, rigid tape measure for accuracy. |
| Forgetting to deduct for inside mounts. | The manufacturer usually makes deductions; provide exact window opening measurements for inside mounts. |
| Not accounting for obstructions in outside mounts. | Ensure the blind will clear cranks, locks, or trim pieces. Measure the overall area the blind will cover. |
| Assuming all windows are the same size. | Measure each window individually, even if they appear identical. |
Ensure Pensure Perfect Fit Every Time
To consistently achieve a pensure perfect fit, a systematic approach combined with meticulous attention to detail is paramount. This involves not only accurate measuring but also understanding the specific requirements of the blind type and mounting style you’ve chosen. Always double-check your recorded measurements against the window before placing an order. For example, if you are considering motorized blinds, ensure you have the correct measurements for the motor housing and any associated hardware, as detailed in our guide to smart living motorized blinds.
Consider the operational aspects of your blinds. For example, ensure that an inside mount blind will have enough clearance to operate without scraping the window frame. For outside mounts, confirm that the chosen overlap provides adequate coverage and privacy without looking disproportionate or interfering with any window hardware. Learning about modern window treatments can further guide these decisions.
After installing hundreds of systems, our professionals have found that understanding these nuances is key to achieving a pensure perfect fit for every window. When in doubt, it is always better to err on the side of caution and measure twice, cut once. This careful process ensures that your new window coverings not only look stunning but also function flawlessly for years to come, and if any issues arise, our ultimate blind repair guide can help.
Benefits of Professional Measurement Services
While this blind measuring guide provides detailed instructions, many homeowners opt for professional measurement services to guarantee a pensure perfect fit. Engaging experts offers a level of assurance that can save time, prevent costly errors, and provide peace of mind. Professionals have the experience and tools necessary to handle complex window shapes and situations.
A key benefit of professional measurement is accuracy. Our team of experts understands the precise requirements for various blind types and mounting options, ensuring that the measurements taken are exact. This precision is crucial for custom-made window treatments, where returns or remakes due to measurement errors can be expensive and time-consuming. Utilizing our services means you can be confident in the outcome.
Furthermore, professional measurement services can also offer valuable advice on the best window treatment solutions for your specific needs and aesthetic goals. They can identify potential issues you might overlook and suggest options that best suit your home’s style and functionality, ultimately contributing to a flawless installation and a pensure perfect fit. Exploring the benefits of custom blinds often leads homeowners to seek professional assistance for measurement and installation, especially when considering modern window treatments for more.
Maintaining Your Blinds for Long-Term Fit
Ensuring a pensure perfect fit isn’t just about the initial measurement and installation; it also involves proper maintenance to preserve the blinds’ functionality and appearance over time. Regular cleaning and care can prevent issues that might affect how your blinds operate and fit within their designated space. For instance, learning how to clean fabric blinds safely can extend their lifespan and maintain their aesthetic appeal.
Dust and debris can accumulate on blind mechanisms, potentially hindering their smooth operation. Following a consistent cleaning schedule, as outlined in guides on easy steps for pristine blinds, can prevent this. For slatted blinds, gentle dusting with a microfiber cloth or using a vacuum cleaner with a brush attachment are effective methods. Ensure you clean both the slats and the internal mechanisms.
Avoid using harsh chemicals or excessive moisture, as these can damage the blind material or warp components, impacting their fit. For mechanical parts, a light application of a silicone-based lubricant can sometimes help maintain smooth movement. By performing routine maintenance, you help ensure your blinds continue to offer a pensure perfect fit and optimal performance for years to come.
Conclusion: Your Perfect Fit
Achieving a pensure perfect fit for your window coverings is a critical step towards enhancing your home’s beauty and functionality. This comprehensive blind measuring guide has equipped you with the knowledge to accurately measure for both inside and outside mount installations, understand the necessary tools, and avoid common mistakes.
By following these guidelines, you empower yourself to make informed decisions, whether you’re ordering custom blinds or simply ensuring existing ones operate flawlessly. Remember that precision in measurement directly translates to satisfaction with the final product. Consider exploring our professional services for an assured perfect fit, or delve deeper into the benefits of custom blinds for your home.